
Reccy makes gear for India's trails, heat, and monsoons — and we're on a mission to help 10 million Indians get out. This piece first ran in our newsletter, Get Out with Reccy. Subscribe on Substack to get the next one first.
Most trekkers who’ve done a Himalayan route remember their first real river crossing. The water is louder than expected. The current is stronger than it looked from the bank. The rocks shift underfoot. And the realization arrives fast: this is not like walking on a trail.
On many treks — especially in the Himalayas and the monsoon-fed Western Ghats — rivers or streams cut across your path regularly. Some are ankle-deep and calm. Others are cold, powerful, and unforgiving. They can be one of the most underestimated challenges in the outdoors.
Even shallow rivers can hide fast currents, unstable rocks, or sudden drops in depth. A poor crossing technique — or a rushed, misjudged one — can lead to injuries, soaked gear, hypothermia, or a complete derailment of the trek. The truth is: most trekking incidents around rivers aren’t caused by the river itself, but by how people approach them.
This is your complete guide to river crossings — covering how to read the water, how to cross safely, what gear to carry, and what to do when conditions are uncertain.
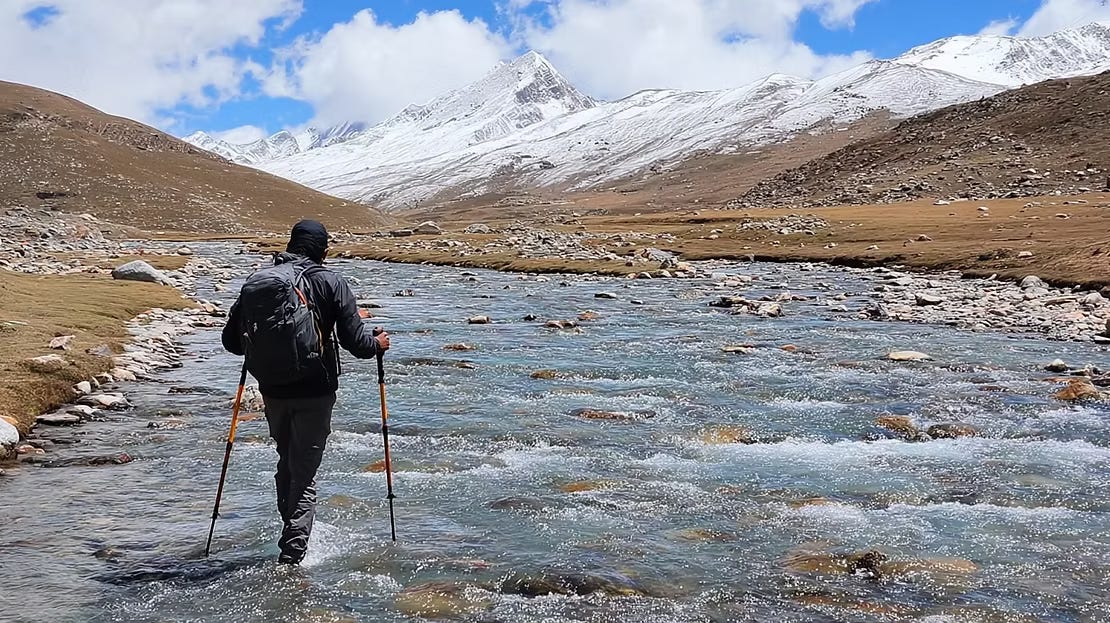
First: Understand What You’re Dealing With
Not all rivers are the same. Knowing what kind of water body you’re crossing helps you make better decisions - before you’re standing at the bank deciding whether to step in.
Glacial melt rivers
These originate from melting snow and glaciers at high altitude. They are typically freezing cold, and the volume increases significantly as the day warms. What’s shallow at 7 AM may be risky by noon. You’ll find these on most high-altitude Himalayan routes — Hampta Pass, Miyar Valley, the Roopkund approach, most of Kumaon. Cross them early in the day.
Rain-fed streams
More common in the Sahyadris, Eastern Himalayas, and forested regions. They can appear suddenly after rainfall and are notoriously unpredictable. The water may be low when you begin. A cloudburst upstream — out of sight, sometimes hours earlier — can send a surge downstream with almost no warning. Murky, brown, sediment-laden water is the tell: a silty river is a river in spate.
Braided channels
Here a river splits into multiple shallower channels. Each individual crossing may seem straightforward, but braided sections demand constant attention — gravel beds shift, deeper trenches sit between segments, and what looks like the last channel may not be. They offer more crossing options, but none of them can be taken for granted.
“One more thing worth doing before the trek begins: research whether your route has river crossings, where they are, and what they're like at the time of year you're going. Trip reports on trekking forums, recent blog posts, and asking operators or guides who've done the route recently can tell you whether a bridge exists, whether a crossing is typically knee-deep or thigh-deep in June, and whether it's known to be difficult after rain. This information changes how you plan your day — when to start walking, whether to carry sandals, whether to camp on the near side if weather looks uncertain. Standing at a river bank and discovering it's more serious than expected is avoidable. A few minutes of research before you leave is all it takes."
The Most Important Thing to Know Before You Enter
Rivers are optically deceptive. Depth and current speed are consistently underestimated from the bank. A river that looks knee-deep may be thigh-deep. A current that looks manageable may be strong enough to sweep a loaded trekker off their feet. This is not a matter of experience — it is how moving water looks from the shore.
The correct mindset before any crossing: assume it has risk. Read it carefully. Assess before committing. And know before you step in what your conditions for turning back are. Most safe crossings happen not because of great reflexes mid-river, but because of smart decisions made on the bank.
Step 1: Assess the River Before You Cross
Never treat a river like a road crossing. The safest-looking section can still be dangerous if the current is fast or the bed is unstable. A few minutes of observation from the bank is worth more than any technique in the water.
Walk the bank first
Don’t cross at the point where the trail arrives at the river — that spot was chosen for the trail, not for the crossing. Walk upstream and downstream to find a better option. You’re looking for the widest section: wider almost always means shallower and slower. The same volume of water spreading across more distance loses both depth and speed. Narrow sections look easier to cross but are typically deeper and faster.
Two quick field tests
The stick test: Throw a stick into the current and walk alongside it on the bank. If you can comfortably keep pace with it, the current is manageable. If it moves faster than a comfortable walk, the crossing needs serious reconsideration.
The stone test: Throw a stone into the section you’re considering crossing. A shallow crossing produces a flat splash. A deep one produces a heavy thunk. You can gauge depth from the bank before committing a single step.
Look downstream before you enter
If something goes wrong mid-crossing and you’re swept off your feet, where does the river take you? Look downstream before stepping in. You want to see open water and accessible banks — not boulders, rapids, or a strainer. A strainer is any obstacle that water flows through but a body cannot: fallen trees, log jams, bridge pilings. They are the most dangerous hazard in a river. Water pressure against a strainer cannot be overcome with strength or swimming. If there are strainers downstream of your planned crossing, find a different spot.
Check entry and exit on both sides
Your exit point on the far bank should be flat, accessible, and clear of dense vegetation. Rivers carry you slightly downstream as you cross — your exit will not be directly opposite your entry. Identify it clearly before you step in, and make sure you can reach it from where the current will bring you.
The depth and current threshold
Water above mid-thigh in any meaningful current is dangerous regardless of fitness level. A current faster than a comfortable walk — roughly 4 mph — can knock a loaded trekker off their feet. If you can’t maintain stable footing while probing with a pole at the entry, don’t cross. If the water is cloudy or silty and you can’t see the bottom, probe extremely carefully — hidden depth drops, submerged boulders, and holes are the hazards that cause falls when there’s no visible warning.
Step 2: Prepare Before You Step In
Loosen your pack straps — with one nuance
In most situations, loosen or unbuckle your hip belt and chest strap before entering the river. If you fall and your pack fills with water, the weight can pin you down. Being able to ditch it immediately could save your life. The pack is replaceable.
The nuance: if you’re boulder hopping or pausing mid-crossing on unstable ground, loosening your pack may throw off your balance. In those cases, keep the straps buckled and decide based on the terrain and your confidence.
Pro tip
Keep a small ziplock with essentials — ID, emergency medication, phone — in a jacket pocket or attached to your belt, not buried in the pack. So that if the pack has to go, you haven’t lost everything.
Footwear — choose based on conditions
Always wear footwear when crossing. Barefoot crossings are a false economy. Underwater rocks are sharper, more slippery, and more unstable than they look. A cut foot or twisted ankle mid-crossing is far worse than wet shoes for the afternoon.
Wear trail shoes or hiking boots when: the water is murky or fast, the bottom is rocky or uneven, you need maximum grip and toe protection.
Sandals or floaters can work when: the water is clear and shallow with a smooth sandy or pebbled base, and you have a secure heel strap that won’t float off.
Many trekkers on routes with known crossings — Hampta Pass, Miyar — carry a separate pair of lightweight sandals specifically for river crossings, keeping their trekking shoes dry and intact. Pack an extra pair of socks for after.
Use two trekking poles or a strong stick
Your pole is not just a prop — it’s a third point of balance. For any crossing in significant current or on an unclear bed, use two poles. Plant one ahead of you upstream to test the next step. Keep the second anchoring you from behind. You are creating a tripod — two legs and two poles, with at least three points of contact before each move. Extend the poles slightly longer than your usual walking length to account for the depth.
Step 3: How to Cross
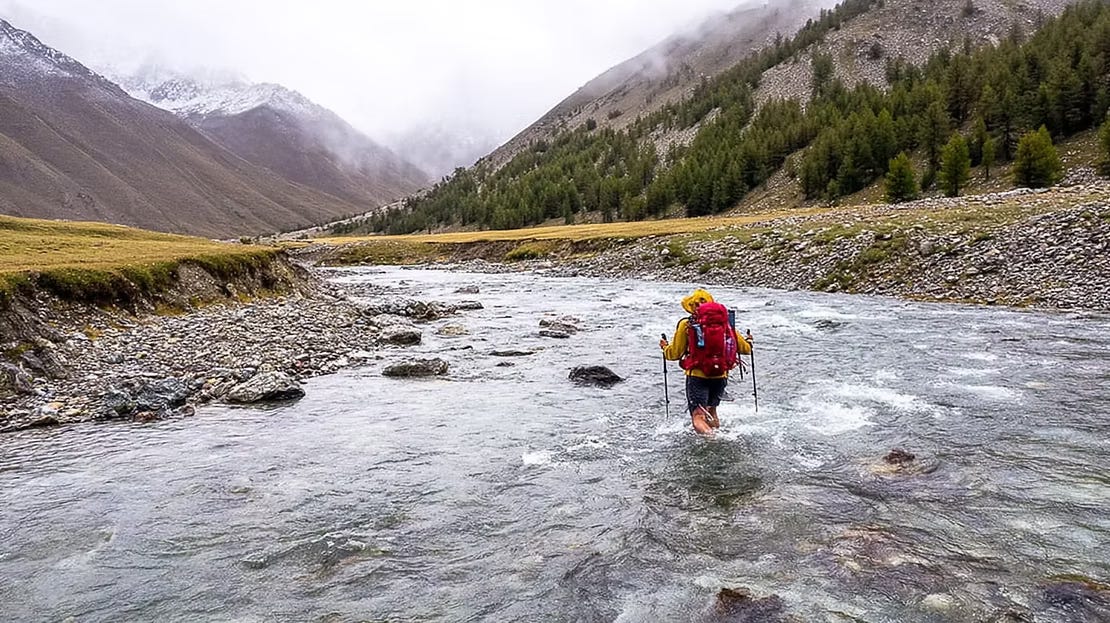
Solo crossing
Face upstream, or upstream at a slight angle. Never face downstream or cross sideways with your back to the current — both positions make you vulnerable to being pushed backward onto obstacles you can’t see.
Shuffle, don’t step. Slide your feet along the riverbed rather than lifting them. Lifting your foot abruptly creates a moment where you have one point of contact, and if it shifts — a loose rock, a hidden drop — you lose footing instantly. Shuffling keeps your feet low and in contact.
Move diagonally downstream, not straight across. Fighting the current directly increases resistance and fatigue. Let the flow carry you slightly toward your exit point rather than working against it.
Lean slightly into the current. It sounds counterintuitive, but leaning against the flow keeps you balanced. Leaning away from the current shifts your weight backward and makes a fall more likely.
Keep your knees bent. A slightly bent knee absorbs sudden shifts underfoot and lowers your centre of gravity. Never lock your knees mid-crossing.
Eyes on the far bank, not on the water moving past you. Watching the current can induce disorientation and vertigo. Look at where you’re going.
Group crossings
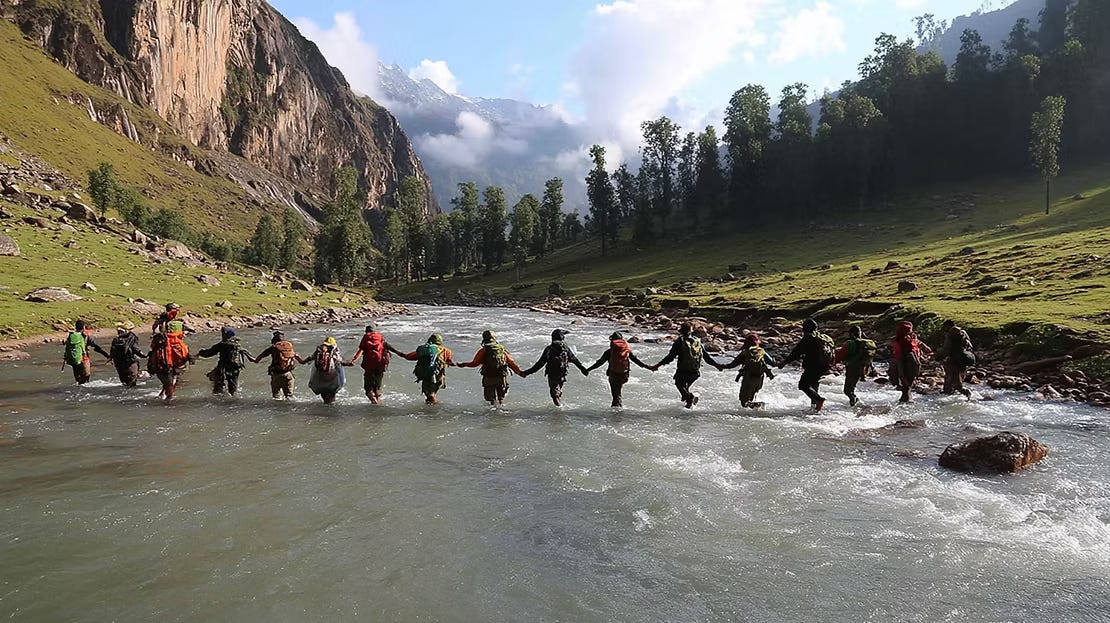
Group crossings offer added stability — but only when done correctly. A group that loses coordination mid-crossing is more dangerous than solo trekkers going one at a time.
Line or chain formation (for moderate flow, larger groups): The group forms a single line facing upstream. The strongest person goes first, upstream, absorbing most of the current. Each person holds the shoulder or pack strap of the person ahead. Move in synchronised steps — one person calls each move: “step,” “stop,” “steady.” If one person slips, the others brace. Use poles on both ends of the line if available.
 Triangle formation (for stronger current, three people): Three trekkers stand in a triangle, facing inward, each gripping the others’ shoulders or pack straps. The person at the upstream point takes the force of the current, the other two provide lateral and rear support. Move slowly, leaning against each other, stepping in sync. This structure moves as a single unit.
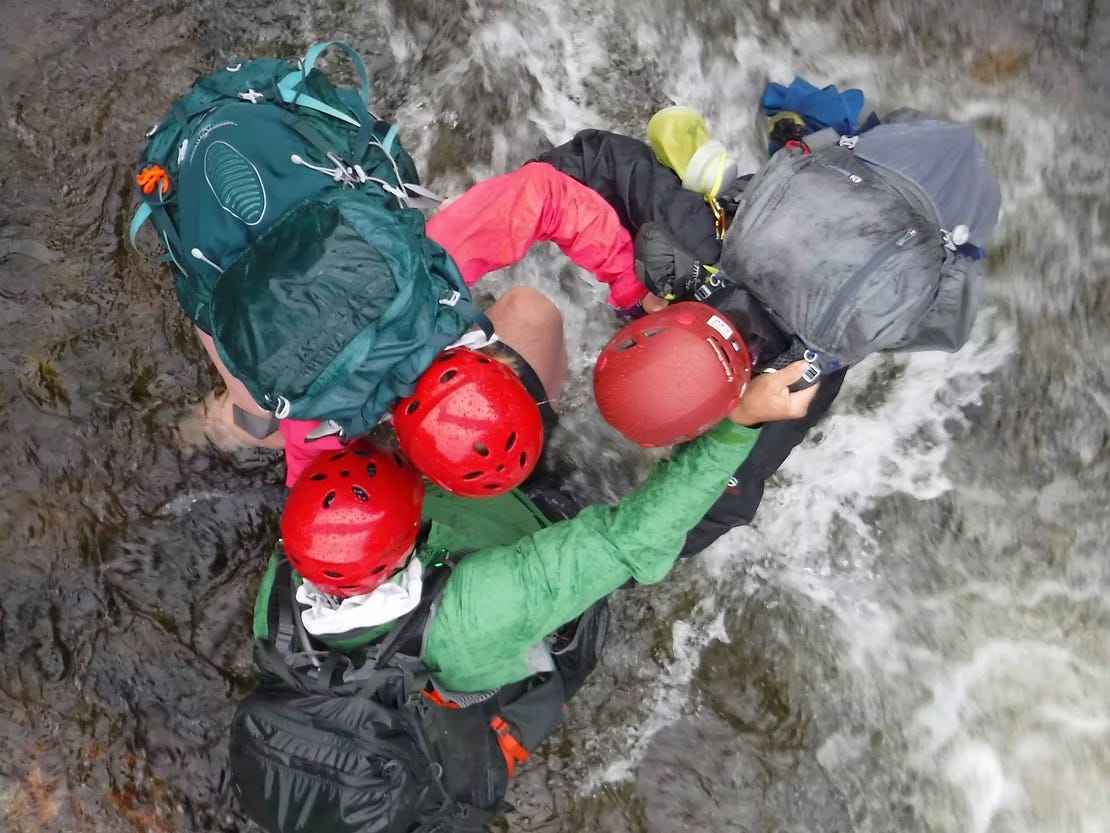 Always communicate clearly before each move. Never rush group crossings — they should be slower than solo, not faster.
On glacial rivers
Glacial streams are fed by snowmelt and run lowest in the early morning before the day’s heat accelerates the melt. A stream that’s ankle-deep at 6 AM may be knee-deep and significantly faster by noon. On routes with known glacial crossings — Hampta, Miyar, most high-altitude Himalayan routes — plan to cross early.
Step 4: What to Do After You Cross
Reaching the other side doesn’t mean the crossing is over.
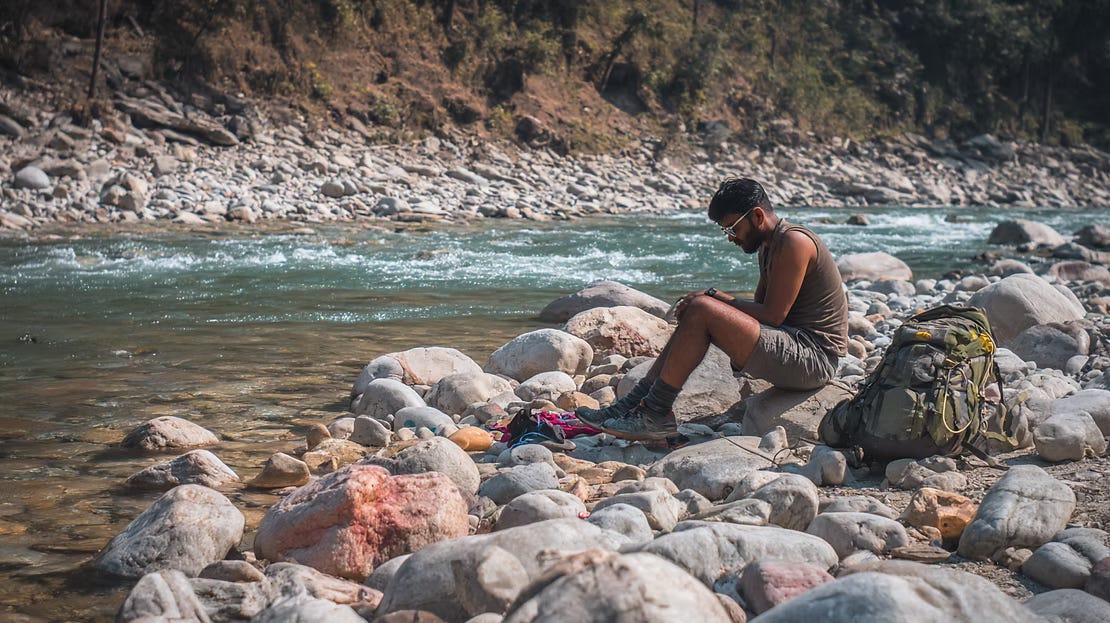 Check for injuries first. Inspect feet, ankles, and knees. Even minor slips leave cuts or bruises. Cold water numbs sensation, which means you may not feel a cut or a knock until you’re standing on dry ground. Use your first-aid kit if needed.
Change into dry layers. Wet clothes at altitude accelerate heat loss. Change your base layer or at minimum your socks as soon as you can. Hypothermia risk doesn’t disappear the moment you’re out of the water — it continues as long as you’re wet in moving air.
Warm up from the inside. Drink something hot or eat a small high-energy snack — dry fruits, trail mix, gur — to help your core temperature recover.
Rest before moving on. Take 10 to 15 minutes. Let your muscles settle and your breathing reset. Use the break to check if any electronics or gear inside your pack got damp — dry them in the sun if needed before repacking.
What Not to Do While Crossing
Even experienced trekkers make these mistakes — usually when tired, rushing against time, or overconfident after an easy morning.
Don’t cross barefoot. Rocks under a river can be sharp, mossy, or loose. Barefoot crossings reduce traction and invite cuts, stumbles, and ankle twists. Always wear footwear with grip and toe protection.
Don’t sling boots around your neck. Tying boots around your neck or hanging them from your pack while crossing seems clever — but the weight swings with every step and throws off your balance at exactly the moment you need it most. Keep boots on or packed securely.
Don’t wear long pants into a meaningful current. Loose, baggy trousers create significant drag in moving water. Change into shorts or tightly roll up before crossing anything more than a calm, shallow stream.
Don’t rush. Speed is not your friend in a river. Moving quickly reduces your ability to feel the riverbed, test each step, and react to sudden changes. It’s okay to take time. It’s not okay to lose footing.
Don’t cross alone if you can help it. A partner can stabilise, offer a pole, or pull you back if something goes wrong. On group treks, coordinate — don’t let the group scatter across a river one by one without watching each other.
Don’t fight the current. Always face slightly upstream and let your body move diagonally with the current, not against it. Trying to walk straight across increases resistance and fatigue rapidly.
Don’t tie a rope around your body. A rope tied to a person in a river crossing is not a safety line — it is a hazard. If you fall and the rope is tied to you, the current can use it to hold you down rather than let you float free. A rope can be used to secure gear, but must never be wrapped around hands or tied to a person. You must always be able to let go.
Don’t panic if you slip. If you’re swept away, the instinct to stand up can kill you (foot entrapment). Stay calm. Roll onto your back. Feet downstream, toes up. Float toward the bank. Standing comes only when the water is shallow and calm.
The Hazard Most Trekkers Don’t Know About
There is one river hazard that is poorly understood by most trekkers and is responsible for a significant number of crossing fatalities: foot entrapment.
When you fall in moving water, the instinct — the same instinct that serves you on land — is to stand up. In a river with any current, this is the wrong response. If your foot catches between two submerged rocks while you’re trying to stand, the current immediately pushes your body downstream while your foot stays fixed. The water pressure holds you down. A life jacket won’t save you — the force of the water overwhelms the flotation. This is foot entrapment, and it is nearly always fatal.
If you fall: do not try to stand. Roll onto your back. Feet downstream, toes up. Arms out. Float toward the nearest bank.
Keep your feet pointing downstream with toes up — so your feet and legs absorb impacts from rocks, not your head. Use your arms to steer. Float with the current toward the nearest accessible bank. Only attempt to stand when you’re in genuinely shallow, calm water — knee-deep or less, with no significant current.
Knowing this before you need it is the only way it’s useful.
Cold Water Is a Medical Risk, Not Just Discomfort
Glacial rivers in the Himalayas are cold enough to matter medically. Cold water conducts heat away from the body 25 times faster than cold air at the same temperature. Immersion in glacial water can impair your ability to coordinate movements within minutes — well before you feel seriously ill. Early symptoms of hypothermia are shivering, confusion, and loss of fine motor control. Once you’re mid-river and your hands and legs are going numb, your ability to execute careful, controlled technique degrades rapidly.
This is one of the strongest reasons for the early morning crossing rule on glacial routes: the water is not just lower, it is also slightly warmer before hours of melt have run through it.
After any significant cold water crossing — even a successful one — take 10 to 15 minutes before continuing. Change wet layers if you have them. Eat something. Drink something warm. Your core temperature drops during a crossing even if you feel fine on the other bank, and continuing at altitude while your body is still cooling is a compounding risk.
When Not to Cross
This matters more than everything above it. The skill of river crossing is not just technique — it’s judgment. Specifically, the judgment to not cross when conditions don’t warrant it.
After rain, especially upstream. A river can rise dramatically from rain that fell kilometres away and hours ago. You can be standing at a crossing point under a blue sky while a cloudburst upstream is already sending a surge toward you. If the water is visibly rising or has turned brown and silty — sediment-laden — do not cross. Wait at least one to two hours after rain stops, longer after heavy rain. A silty river is a river in spate.
When the water is above mid-thigh and the current is strong. Even experienced trekkers lose stability here. Each step becomes a fight. A general rule: if you can’t comfortably stand still in the entry without bracing hard, don’t attempt the crossing.
When you can’t see the bottom. Murky, reflective, or debris-carrying water hides depth drops and submerged hazards your pole can’t always catch in time. Wait until it clears, or find an alternate section.
When you’re tired, cold, or not thinking clearly. River crossings demand total attention. Fatigue degrades balance, reaction time, and judgment simultaneously. If it’s late in the day, you’re already chilled from descent, your legs are shaky, or you’re in any state you’d describe as “not quite right” — that is exactly when not to cross. Camp on the near side and cross in the morning when you’re rested and the glacial flow is at its lowest.
When there’s no safe exit. Never enter a river unless you’ve confirmed where and how you’re getting out. Bushes, cliffs, or unstable mud on the far bank can trap you, especially if the current brings you off target.
When it doesn’t feel right. Instinct matters. If the crossing doesn’t feel manageable, it probably isn’t. Turning around is not failure. The trail will be there the next day, or later in the season when the water is lower. A schedule is not worth more than the judgment to walk back.
Pre-Crossing Checklist
Before you step into any river, run through this quickly:
Have I chosen the widest, shallowest section?
Did the stick test pass? Current no faster than a comfortable walk.
Is the current below mid-thigh depth?
Have I checked downstream? No strainers, boulders, or rapids.
Are both entry and exit points clear and accessible?
Am I wearing footwear with grip?
Are my essentials stored on my body, not just in the pack?
Are my pack straps loosened?
Do I have poles or a stick?
Am I physically and mentally ready?
Do I have a backup plan if this doesn’t go as expected?
River crossings are not just about physical strength — they’re about judgment, preparation, and respect for what’s in front of you. Every river behaves differently, and what worked on one trek may not work on the next. But with the right knowledge and the honesty to turn around when conditions aren’t right, you can cross safely and confidently.
When in doubt, don’t cross. The trail will always be there. But only if you make it there.
Get Out.
Heading on a Himalayan trek this season? Forward this to your group before you go — river crossings are one of the most underprepared-for challenges on the trail, and this is exactly what you need before you’re standing at the bank.